How to successfully set up your Git repository and deployment credentials in Azure
Some time ago I experienced problems setting up my Git repository in Azure. I had created an Azure application service and wanted to host my code in Azure, so that I could do continuous integration and be able to use all the awesome stuff from Azure DevOps on code push. It wasn’t easy to get it right, but after some digging and try-and-fail attempts I finally managed to get it working. I thought that I would share with you in a step-by-step guide how I finally got it working.
Let’s assume that created your Azure application service through the Azure portal and chose Git as your source control (who doesn’t in this day and age?). You created the repository locally and you’re ready to host it in Azure, go to the root folder of the repository and then:
git remote add azure https://[nameofyourapplication].scm.azurewebsites.net:443/
If you decide to change the remote URL at a later point, you can do it like this:
git remote set-url azure https://[nameofyourapplication].scm.azurewebsites.net:443/
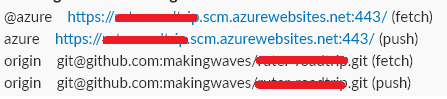
Now you can check what’s remotely set up in Git by doing:
git remote -v
This will show you a list of what’s set up in origin as well as your custom remote, here’s an example:
Now before you can start pushing your code to Azure, you need to set up deployment credentials in the Azure portal. Click on your application service in the portal, go to Deployment Center then click on Deployment Credentials and choose User Credentials:
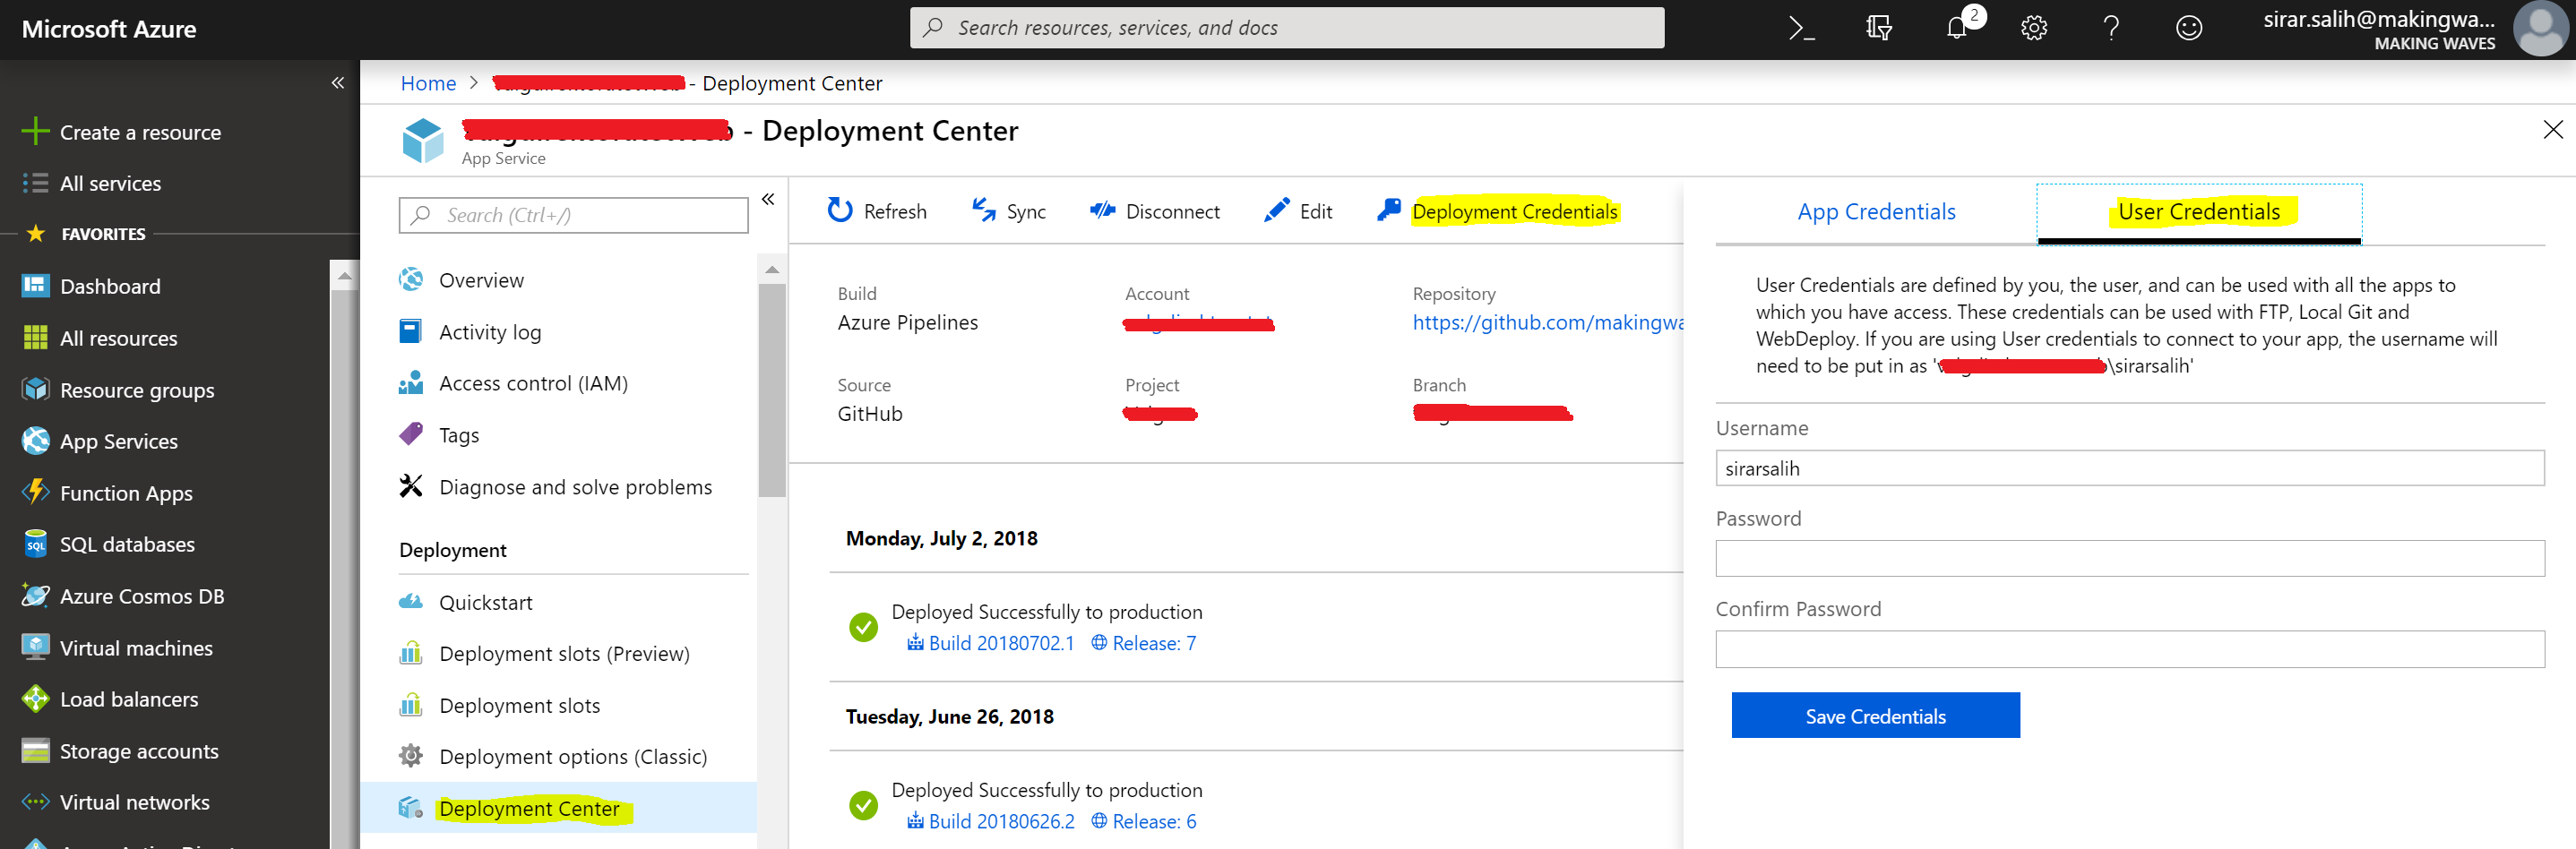
Add a username, password and then save the credentials. Now commit your code and then push it to the Azure remote:
git commit -m "Initial commit."
git push azure master
When you’re prompted to login, use the deployment credentials that you saved in the portal previously and you’re good to go!